


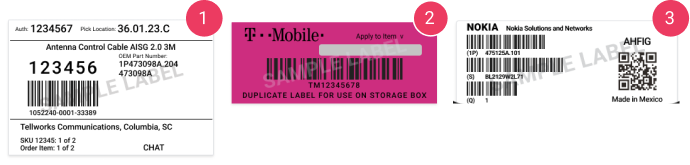


After confirming all material on the return order, complete the following actions to process the return:
![]() Digitally sign for the material, replacing the physical signature on the packing slip. This will be stored as half of the digital handshake acknowledging acceptance and initiating the exchange of custody.
Digitally sign for the material, replacing the physical signature on the packing slip. This will be stored as half of the digital handshake acknowledging acceptance and initiating the exchange of custody.
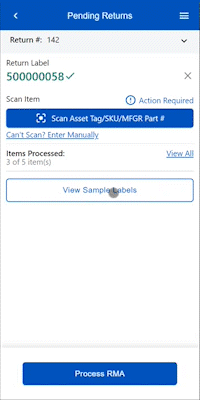
![]() Select the ‘Process Return’ button to complete the return.
Select the ‘Process Return’ button to complete the return.
